Geeking out w/ networkQuality

macOS Monterey has a new command line utility called “networkQuality.” Per the man page:

networkQuality allows for measuring the different aspects of Network Quality, including:

     Maximal capacity (often described as speed)

     The responsiveness of the connection. Responsiveness measures the quality of your network by the number of roundtrips completed per minute (RPM) under working conditions. See https://support.apple.com/kb/HT212313

     Other aspects of the connection that affect the quality of experience.

The best part of this tool (IMO) is that it measures the “Maximal capacity” or speed of my internet connection. I know there are other speed test tools available but I like that this one is built-in. As pointed out by Jeff Butts at macobserver.com, “networkQuality uses Apple’s CDN at https://mensura.cdn-apple.com/api/v1/gm/config as the target for its testing.” I’ve seen pretty big differences between using networkQuality and other web based speed testing sites; but, networkQuality seems to most closely match the speed results reported from my eero router.

Lately, I’ve been using GeekTool to add scripts that report the battery percentage of my connected bluetooth devices (AirPods Pro and my Apple Keyboard). I decided that my download speed would be a good addition. I wrote this small python script that parses the JSON output in Mbps and displays the result in the lower left corner of my screen. I have this geeklet set to run every 30min.

#!/usr/bin/python

import json
import subprocess

def mbps(speed):
    return int(round((speed / 1024 / 1024), 0))

# Args: c – outputs in JSON, s – tests download and upload separately
cmd = ["/usr/bin/networkQuality", "-c", "-s"]

response = json.loads(subprocess.run(cmd, capture_output=True, text=True).stdout)

# Download Speed in Mbps
dl_throughput = mbps(response.get("dl_throughput", 0))

# Upload Speed in Mbps (not used at the moment)
# ul_throughput = mbps(response.get("ul_throughput", 0))

print(dl_throughput)

Screenshot of my GeekTool geeklets. Left to right: left AirPod battery, right AirPod battery, keyboard battery, networkQuality download speed in Mbps

Advanced Options in Display Calibrator Assistant

TL;DR – Hold the Option key when clicking “Calibrate” in the Displays preference pane to have the option to enable “Expert Mode”.

Like many, I’m now working from home full-time. To help my home office, I bought an LG 29WK50S extra-wide monitor. It’s inexpensive and gets the job done a bit better than my previous external monitor. Once I got it mounted on my monitor arm and set at the right height, then came the annoying but necessary task of calibrating the color settings.

The monitor itself has the standard options for adjusting the brightness and contrast, and some pre-configured monitor modes which affect color temperature as well. And… that’s it. This is where Apple’s Displays pane in System Preferences comes in and will allow you to calibrate the display even more. Clicking the “Calibrate” button will open the Display Calibrator Assistant. By default, the Assistant limits your options to basically just adjusting the Target White Point. That’s good but not enough. In previous OS releases, there used to be an option to enable “Expert Mode” which would also give you control over Native and Target Gamma.

To get that checkbox back, you just need to hold the Option key on the keyboard and then click the “Calibrate” button. Boom! There’s the checkbox. IMO, this checkbox should always be there and just unchecked by default instead of hiding it.

Phonetic Passwords

Problem

Have you ever had to communicate a password with someone over the phone? Unfortunately, I have and I usually dread it. When I have to communicate passwords over the phone (thankfully not often) I will usually pull up a NATO phonetic alphabet so I don’t have a Brian Regan moment.

Idea

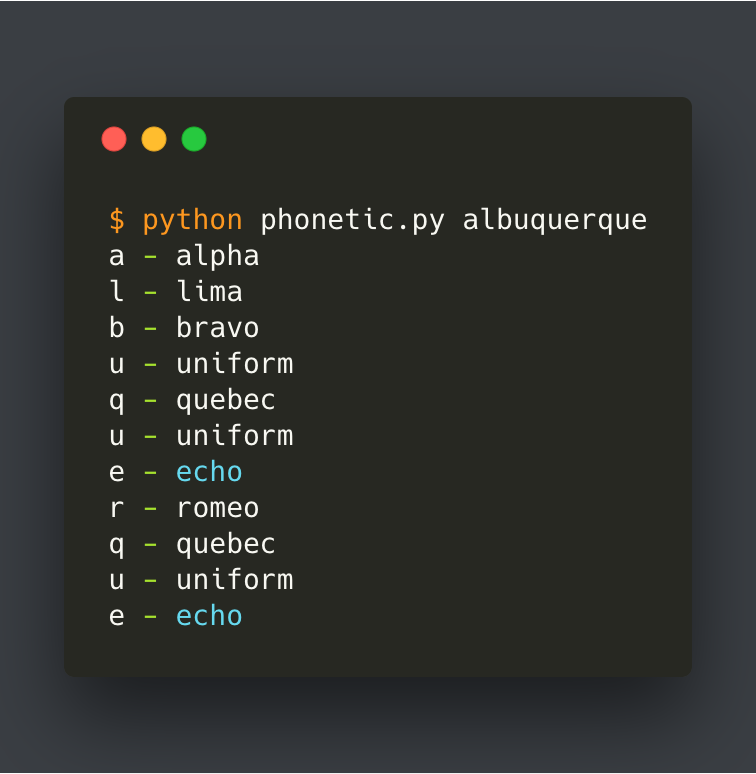
Today, I got to thinking that I could probably just write a script to process each character in a password string and output the phonetic names. Then I realized that someone has probably already done this. To Google I went and did indeed find someone who had written a script for this very thing. Brandon Amos wrote a small python script called phonetic.py that will spit out the phonetic names of characters in a string of text, no matter the size. Here’s an example:phonetic

New Problem

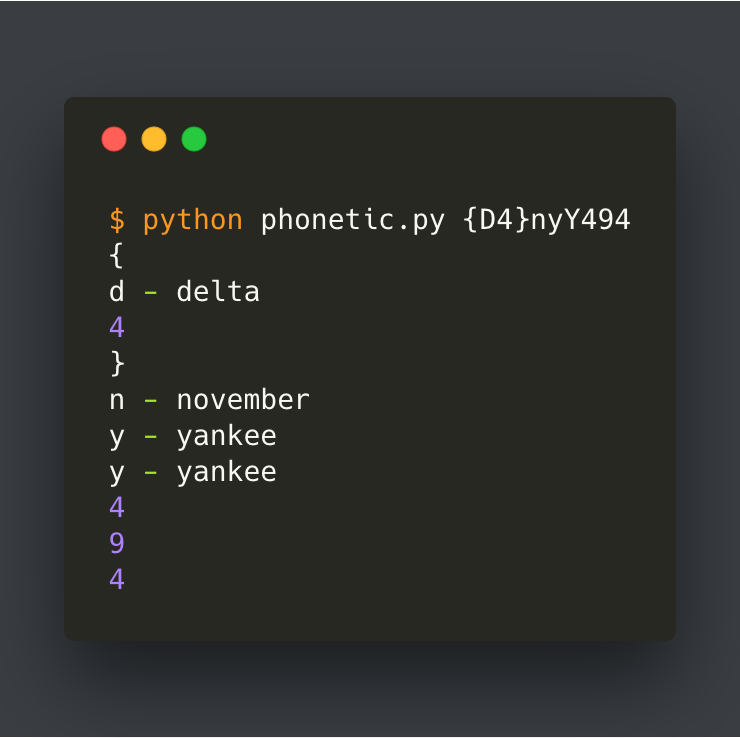
It’s not perfect for my needs as it doesn’t do any special treatments for numbers/special characters and doesn’t differentiate between capital and lowercase letters. See the treatment of ‘yY’ in the image below. phonetic_fail

Solution

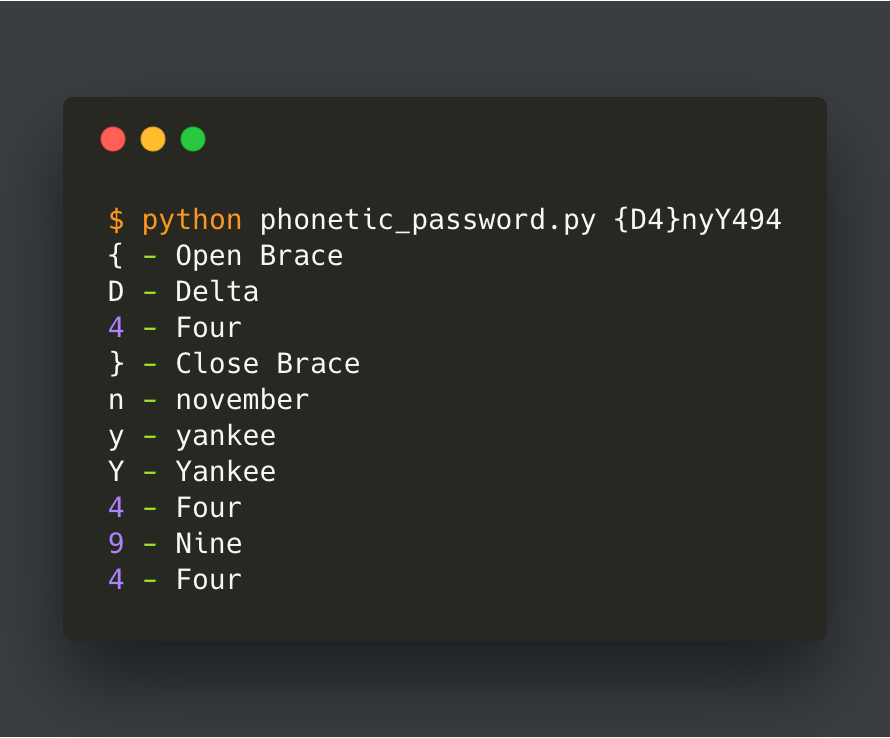
So, I forked Brandon Amos’s repo and created a new file to handle capitals, name the ASCII characters found in good passwords, and even spell out the numbers. This may seem silly since you shouldn’t need to see the word for each number but I wanted this to be as uniform and fool-proof as possible. This is what we get running the same string as before through the new phonetic_password.py file.
phonetic_password

Get the Code

Here’s a direct link to the file: phonetic_password.py

P.S.

If you like the nice screenshots in this post, I made them with Carbon.

Lock your computer when you walk away

UPDATE 11/15/17: macOS 10.13 High Sierra now has a “Lock Screen” shortcut! Just press Control-Command-Q.

UPDATE 09/22/16: I’ve recently learned that you can press Control-Shift-Eject and your Mac will lock the screen immediately. While this is cool for Desktop users with an external keyboard, Apple no longer makes laptops w/ an Eject key. Using the combination of Control-Shift-Power on a MacBook(Pro/Air) does not work at all.

At my organization, we have a policy that when you walk away from your computer (to get a drink or go to lunch, for instance) you need to lock the screen. Generally speaking, this is a good idea. You don’t want someone sneaking a peak at your files or accessing private documents when you’re not around. You also don’t want people throttling your network adapter speed down to 10Mb for a laugh.

Hot Corners

Most people use Apple’s Hot Corners and will set them to enable the screensaver or put the display to sleep, which will prompt for a password the next time you use the mouse or the keyboard. This is effective if you prefer to see the screensaver and have your password timeout set to around 5 seconds.  (See screenshots below)

Fast User Switching

Others use Apple’s Fast User Switching which puts an icon in the menu bar that allows you to go back to the Login Window without logging out of your account. Instead, your account is suspended in the background and you must type in your account password to log back in. When you do login again, all of your applications and windows are exactly as you left them. This is almost like putting your computer to sleep. (See screenshots below)

Sleep

In addition to using the Apple menu to just put your Mac to sleep, there is also a quick keyboard shortcut to put your Mac to sleep. If you press Control-Command-Power (or Eject), your Mac will instantly go to sleep. You need to ensure that you still have a good password timeout as well. You can also put your Mac to sleep with a Hot Corner.

Alias

Personally, I like the approach of suspending your session since it will pause things like my music. Also, I don’t like to use screensavers. My computer will still go to sleep eventually based on my Energy Saver settings; but, until then, it will still do what I asked it to. I don’t like having yet another menu bar icon though. Since I spend much of my day in a command line, I decided to add an alias to my bash_profile that will suspend my session.

To do this, I opened my ~/.bash_profile in a text editor, I prefer nano for quick things.

nano ~/.bash_profile

Then I pasted in the following text on a new line at the bottom of the file (you can change the word “lockdown” to something of your choice):

alias lockdown="/System/Library/CoreServices/Menu\ Extras/User.menu/Contents/Resources/CGSession -suspend"

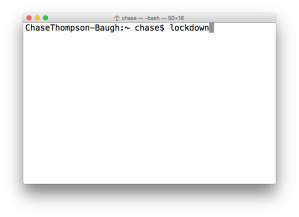
I quit the Terminal session and opened a new one. Now every time I type “lockdown“, my logged in session suspends and takes me to the Login Window, just like Fast User Switching.

Screen Shot 2016-08-23 at 11.47.45 AM

Conclusion

I’ve just detailed four ways to make sure your Mac is locked when you leave it: Hot Corners, Fast User Switching, Sleep, and a Terminal alias. Of course, with the coming of macOS Sierra‘s Auto-Unlock feature, this post might be moot. But if you don’t have an Apple Watch, you can still use the methods above to help keep your data from prying eyes.